Setting up an E-commerce Website should be easy, well, with WordPress, it is!
An E-commerce website gives you global reach to grow your business. With it, you can establish an online brand presence and develop a customer base.
E-commerce websites make the process of ordering products simple, and efficient. It’s no surprise why a lot of people prefer it to physical stores. Statistics predict that by 2026, online sales would make up almost 25% of total global retail sales.
A website can be the decisive factor that makes or breaks your business’s growth potential. To know more, here are 10 reasons why your business will benefit from a website.
Ready to expand your markets? Follow these steps to successfully create an E-commerce Website on WordPress –
Create an E-commerce Website with WordPress
The Essentials for E-commerce Website in WordPress
Before you commence your e-commerce website-building journey with WordPress, there are three essential things to do that act as a threshold for you to lay your groundwork on.
Domain Name
Select a Domain name that best fits your brand. People will use this unique address to access your website.
Hosting Provider
Choose a web hosting provider to make your website and its content accessible on the net.
There are two kinds of WordPress hosting – Self and Managed. With Self-hosting, you manage and operate your own web server. With Managed Hosting, a third-party provider manages and maintains your servers.
Pick the method which you feel is best for your website. If you’re confused on how to proceed, this detailed comparison – ‘Choosing between Self vs Managed’ will give you the insights you need!
Install WordPress
Depending upon your chosen method of hosting, the process of installation differs. With Self-Hosting, you have to download the software from WordPress.org and install it on your hosting provider’s server. Most providers typically offer a ‘one-click’ installation option for WordPress. Just locate that option and follow the given steps to install WordPress on your domain.
With Managed hosting, the installations and updates are taken care of, for you, by your provider.
Plugins for your E-Commerce Website
To set up your E-commerce website, WordPress alone won’t do the trick, you’ll need to pair it up with a plugin. Some of the most popular E-commerce enabling plugins are – WooCommerce, BigCommerce, Easy Digital Downloads (only works for digital downloads), MemberPress and WP EasyCart. Pick a plugin that suits your needs.
In this article, I will show you how to use WooCommerce in WordPress – one of the most popular E-commerce Plugin among users, for a website. Follow these steps –
- Install and Activate the ‘WooCommerce’ plugin.
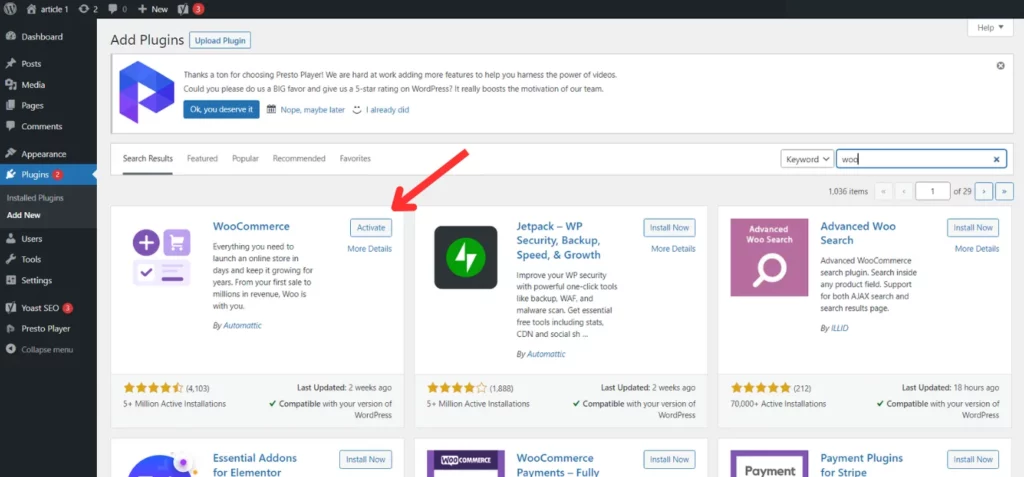
- Once it is activated, you will be directed to a configuration page.
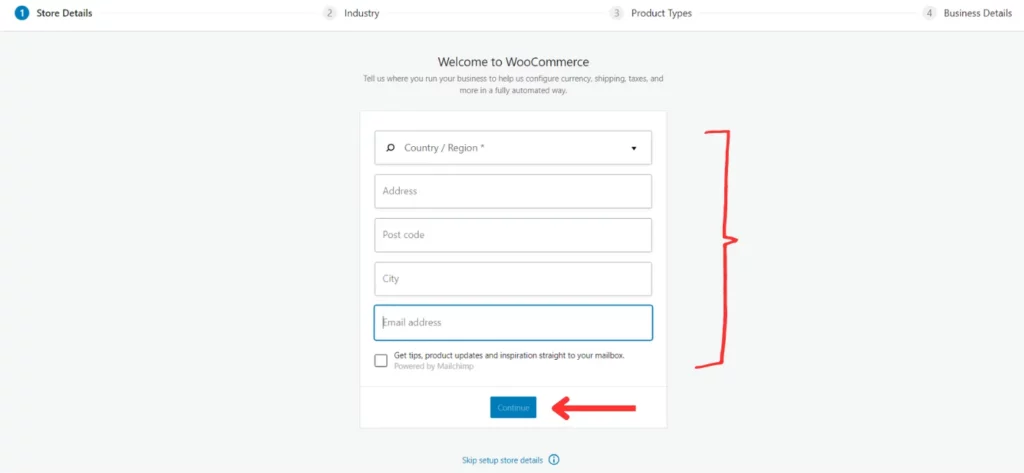
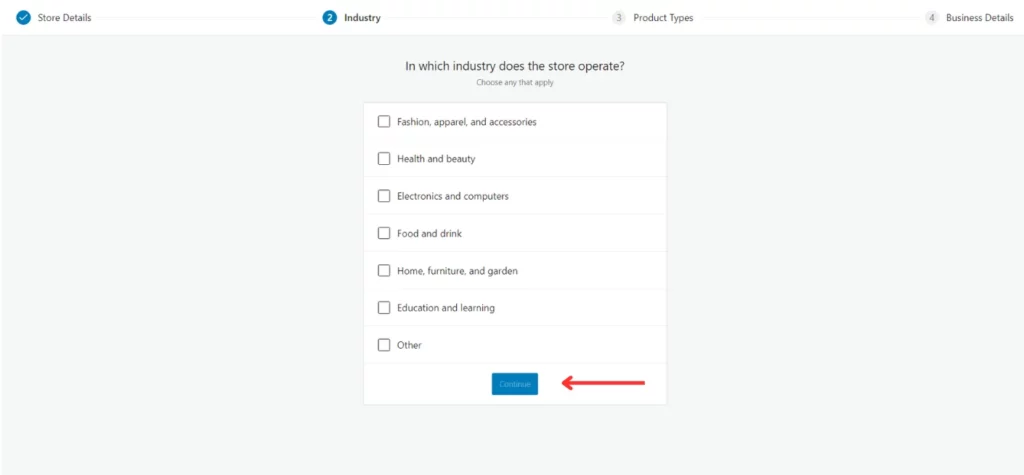
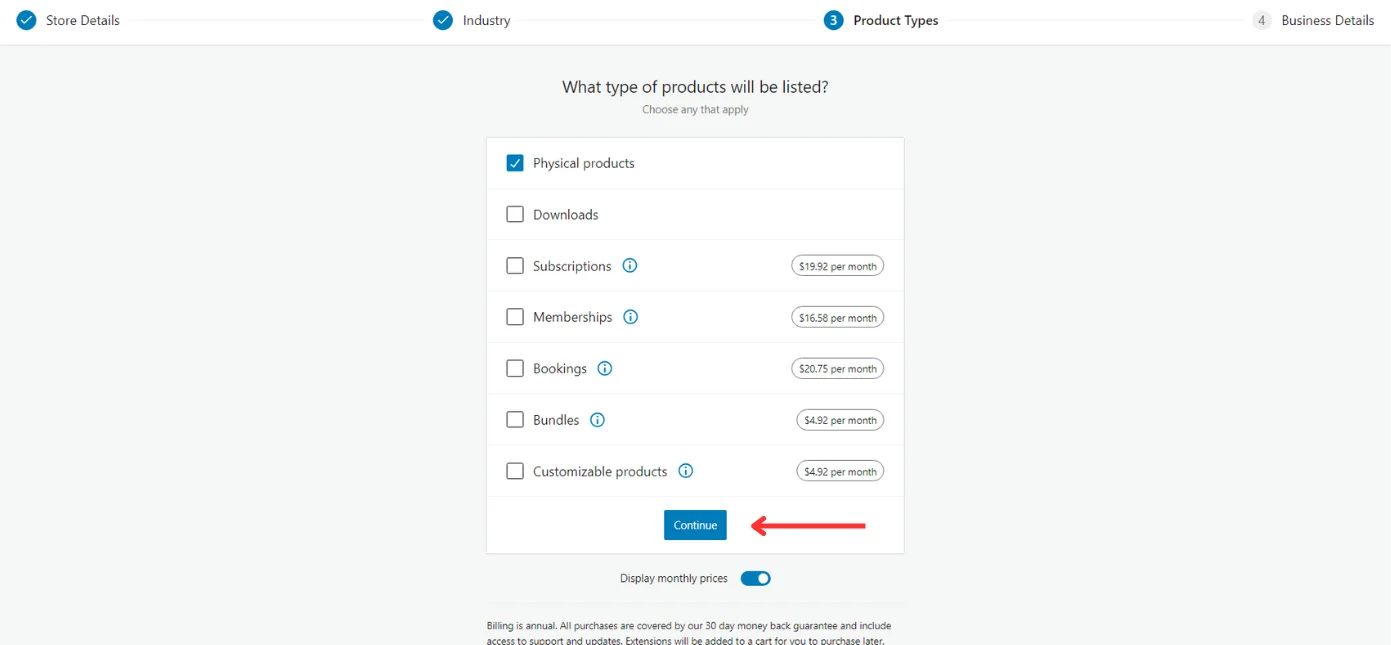
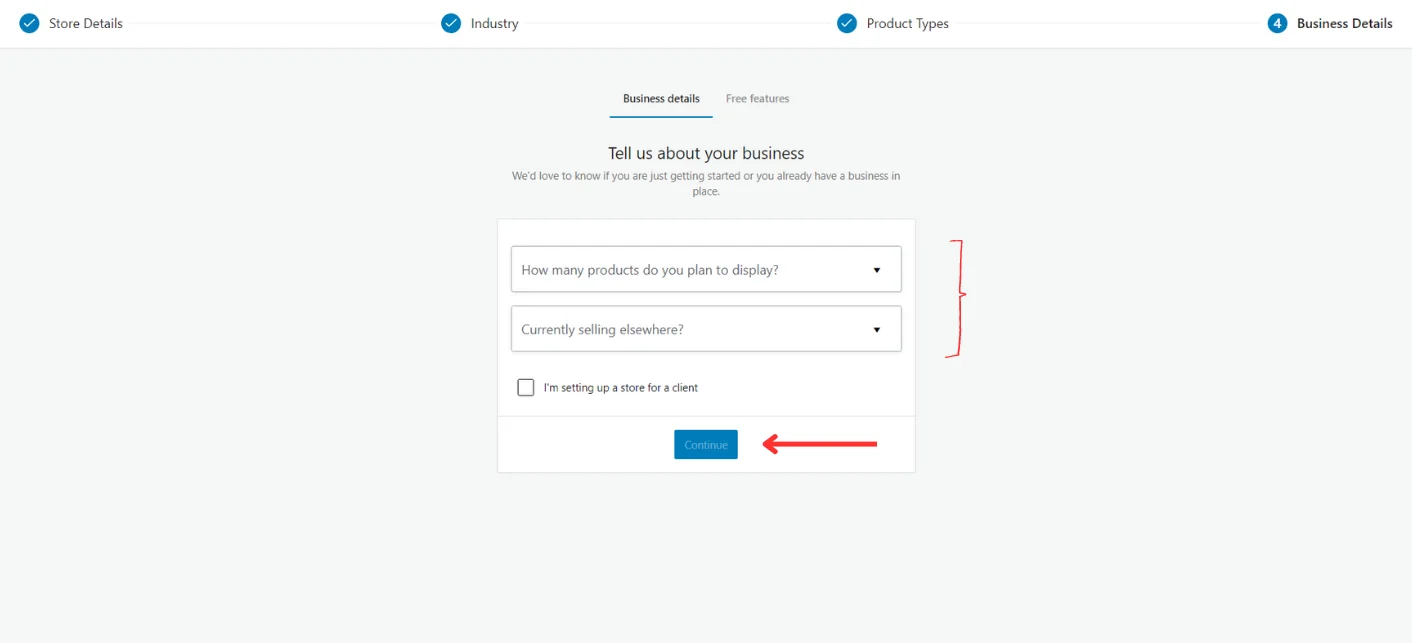
- Fill in your Personal Details. Next, you’ll be asked to choose the Industry your store belongs to and the type of Products you plan to showcase on your website. Once filled, click on Continue.
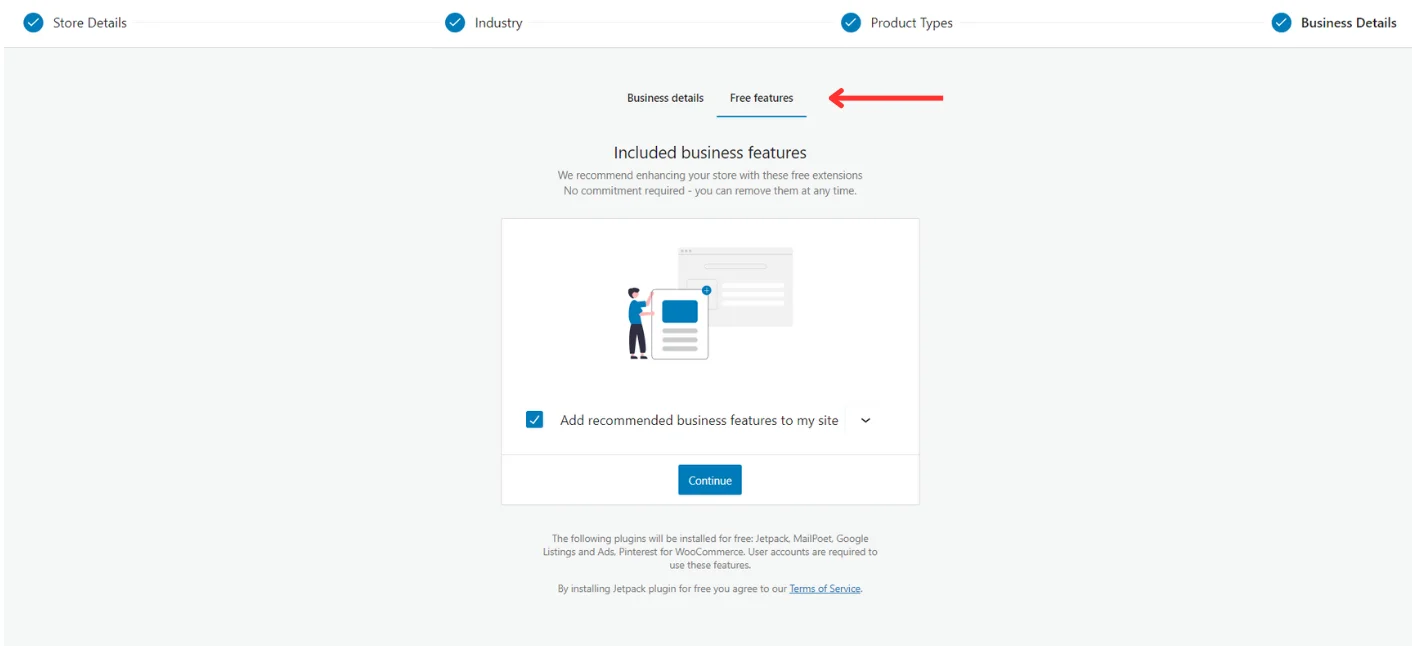
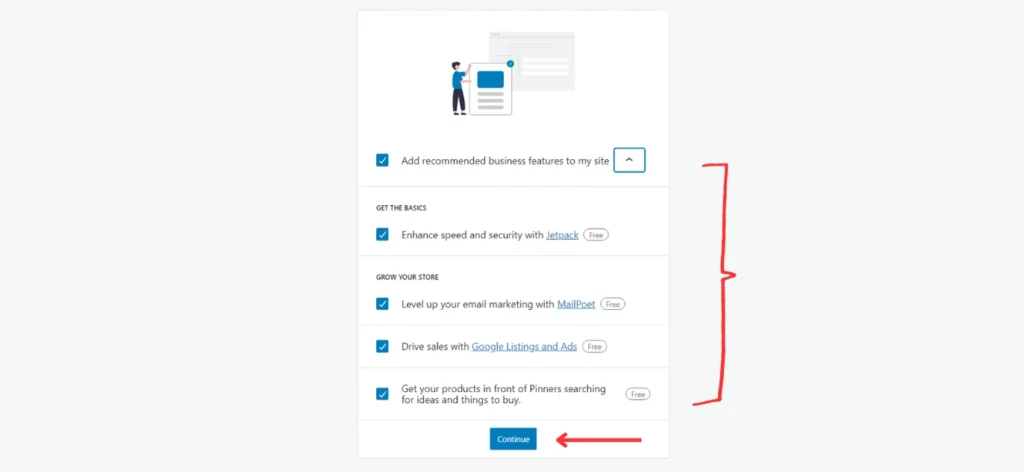
- Enter your Business Details and go through the Free Features provided by the plugin. You can choose to add them to your website or not depending on the utility it presents.
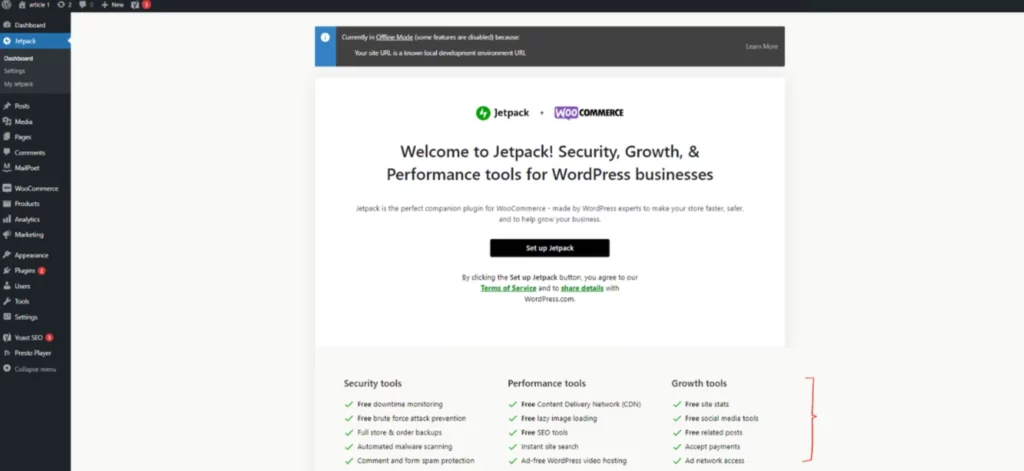
The Plugin has now been set up! Additionally, you can decide to activate ‘Jetpack’, a companion plugin made by WordPress. It offers a range of tools that improve WooCommerce’s functionality. Set up Jetpack if you believe it would help your venture.
Security Features for your E-commerce Website
As an E-commerce website, you ask people to enter their payment details and card numbers. When dealing with vulnerable information as such, it’s imperative that your store uses a secure connection.
An HTTPS connection encrypts your session and makes sure any data transferred between a visitor’s browser and your website cannot be interfered with by malicious individuals or software.
To set up a Secure Socket Layer (SSL) refer to WooCommerce’s Documentation Guide.
Add Product and Shipping Details to your E-commerce Website
Now that the foundation has been laid, let’s lay the bricks, shall we?
Add your products to build a catalog and allow people to shop what you intend to sell. Follow these steps –
- Click on ‘WooCommerce’ from the left-aligned bar on WordPress’s dashboard.
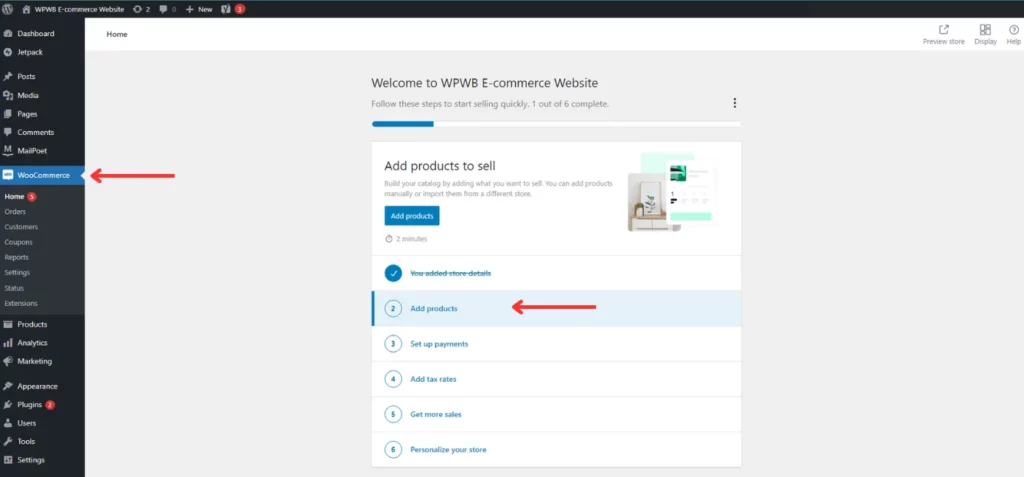
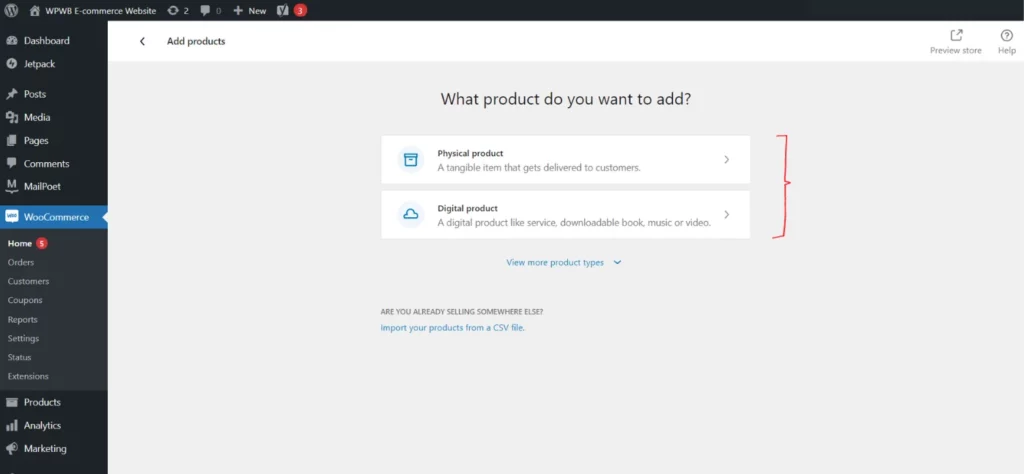
- Select ‘Add Products’ and pick the type of products you wish to add – ‘Digital’ or ‘Physical’.
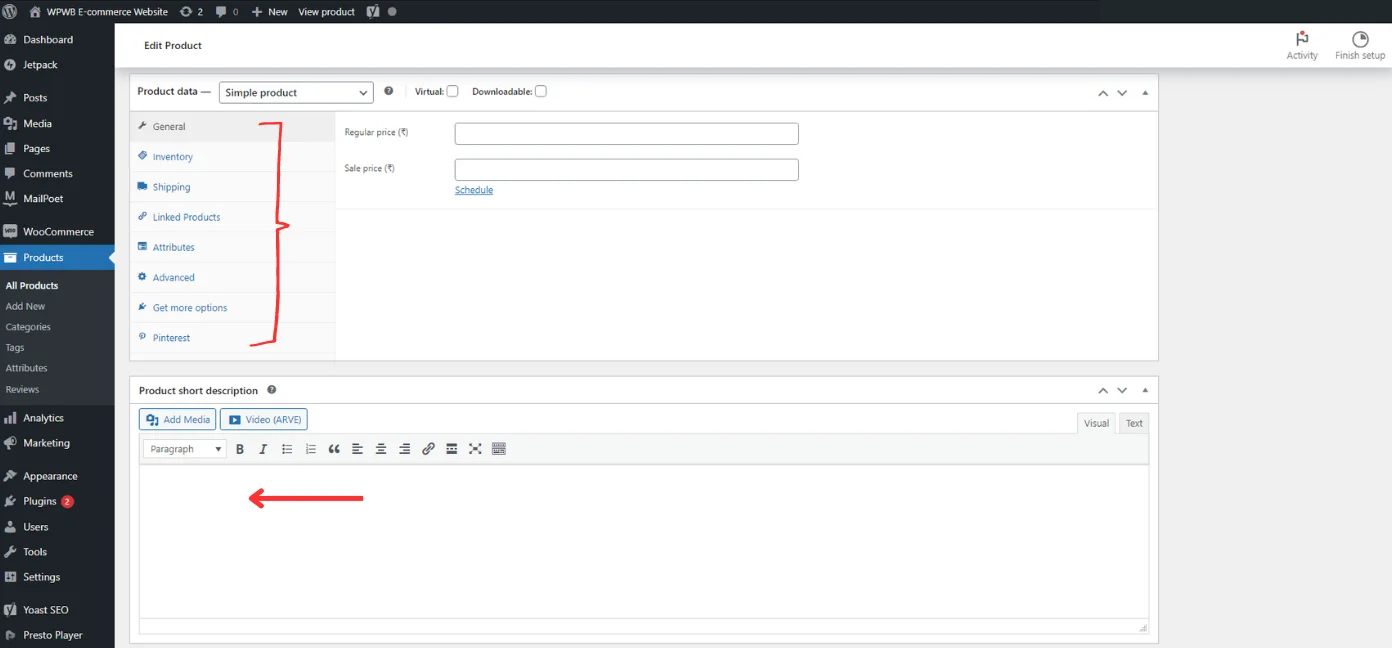
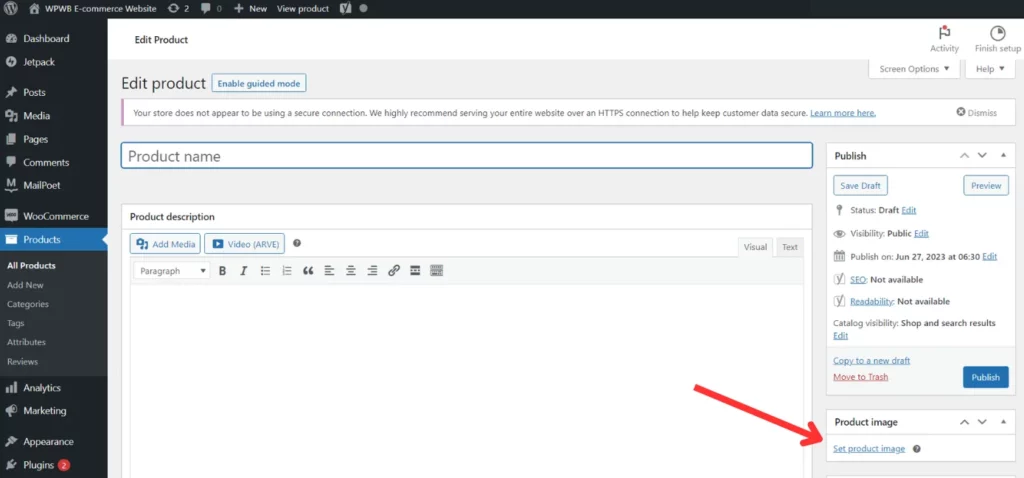
- Add your Product’s Name and a write a detailed Description. Next, you need to enter data pertaining to the product – including pricing, inventory, attributes, and shipping details. As you scroll down, fill in the ‘Product Short Description’.

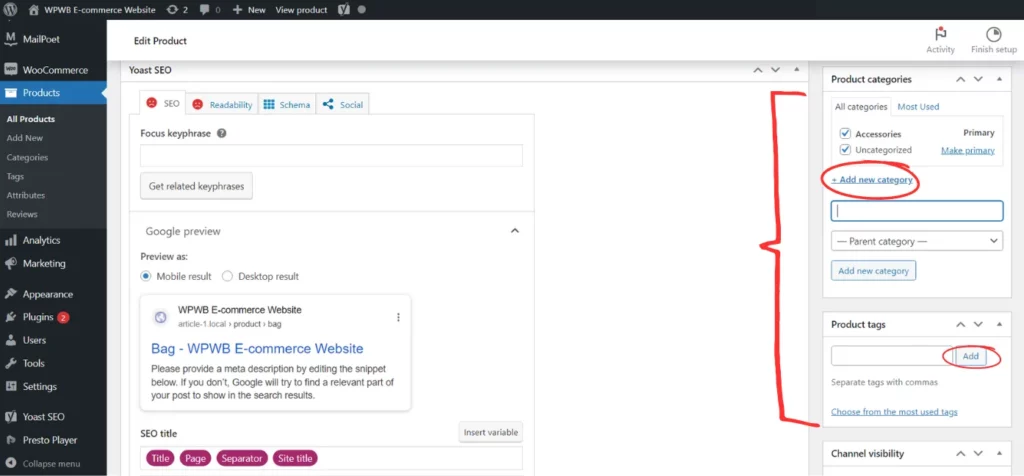
- On the page’s sidebar, you can set a Product Image, Categories, and Tags.
Product Image – You can Upload files directly from your desktop or through the Media Library.
Categories and Tags – You have the choice to add categories or leave them uncategorized. You can also assign Parent categories to products. Use tags to classify products.
Enter all the required details and then hit Publish to see the reflected changes. Add all of your products using the same method.
Set up Payment
To set up Payments, click on ‘Finish Setup’ > ‘Set up Payments’. Or, click on ‘Continue Setup’ to proceed.
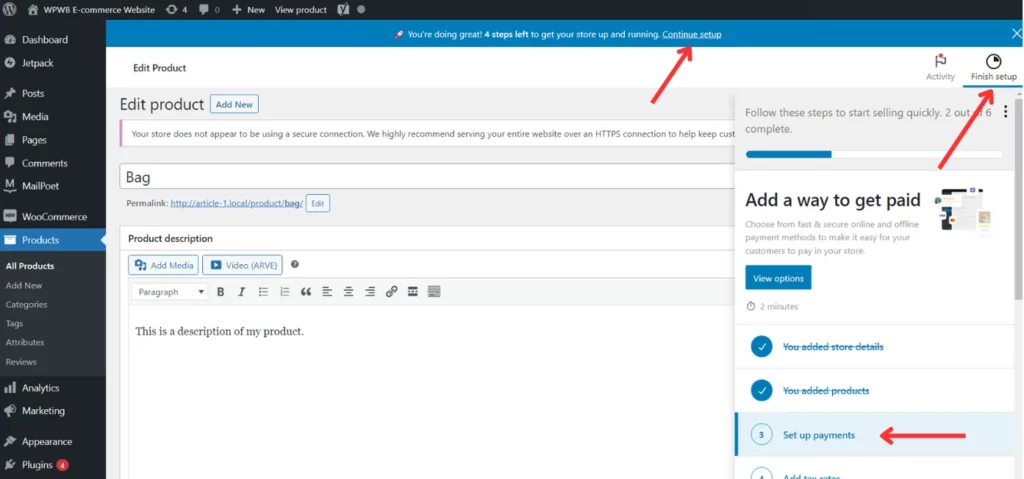
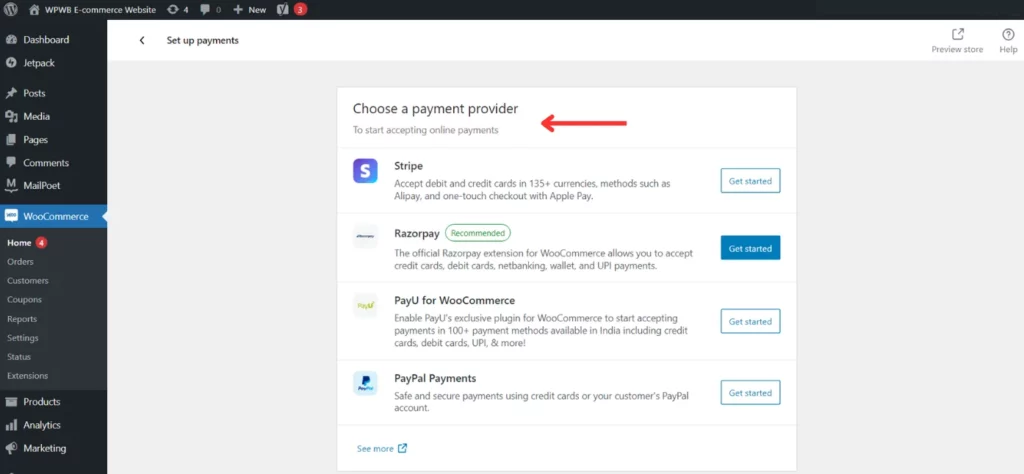
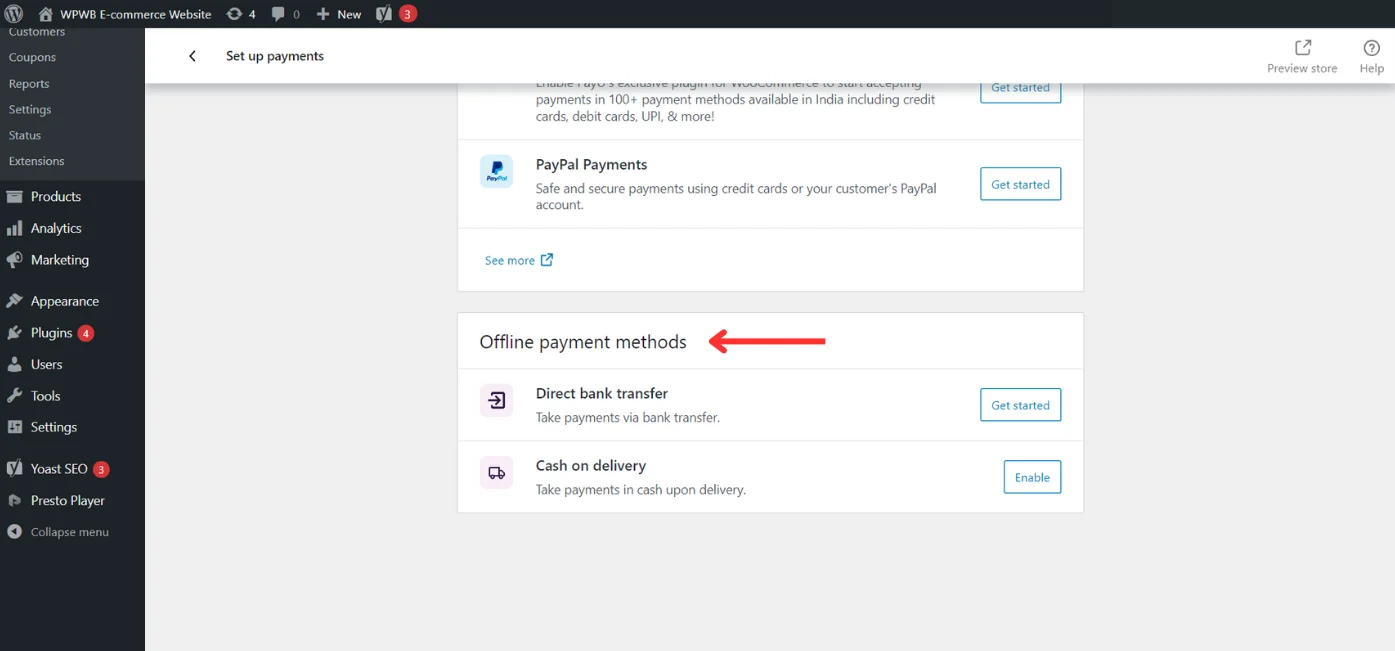
Here, you can choose an online payment provider of your choice or opt to choose offline payment methods. You also have the option to ‘Preview’ your store.
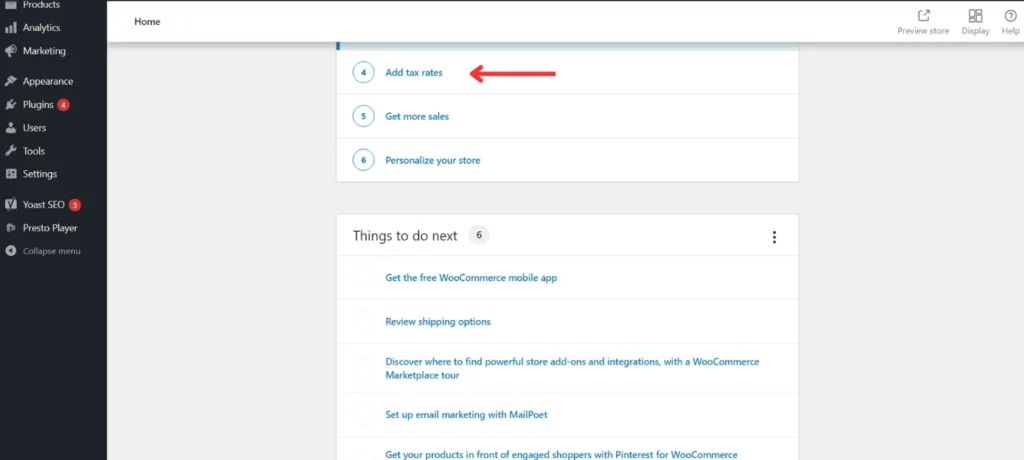
Add Tax Rates
Next task in line, add tax rates and install marketing extensions to increase sales. Click on ‘Continue Setup’ and choose ‘Add Tax Rate’ from the list –
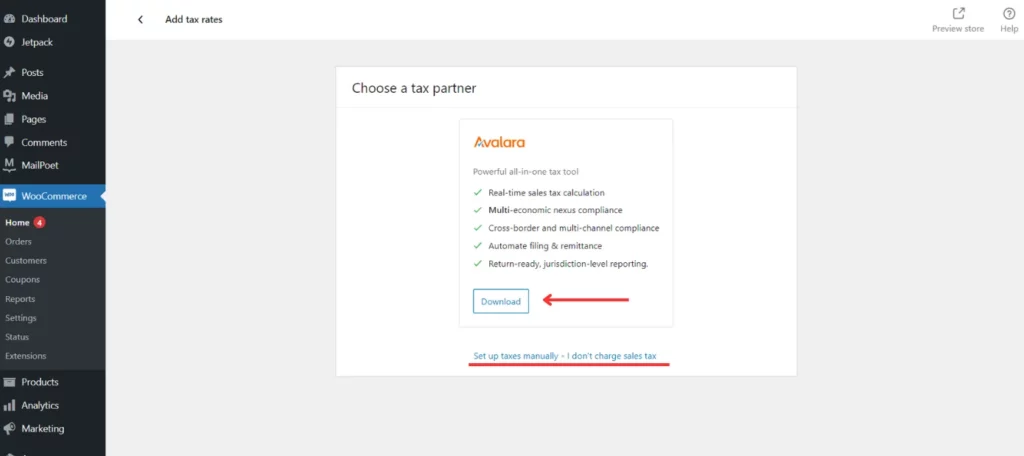
You can choose a tax partner; WooCommerce gives you the option of partnering up with Avalara. If your business does not charge taxes, click on ‘I don’t charge sales tax’. Click on ‘Set up taxes manually’ to manually enter details in the ‘Tax’ tab.
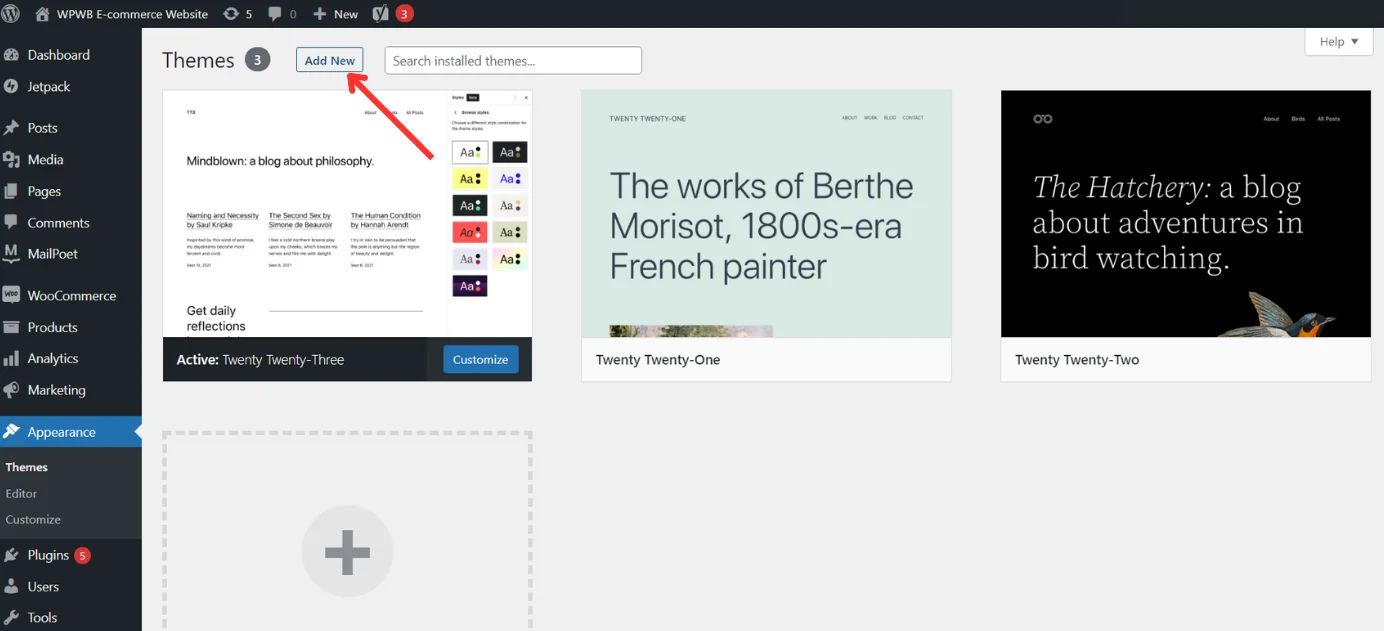
Pick a Theme for your E-Commerce WordPress Website
Selecting a theme that conveys the essence of your brand is pivotal for the success of your website. To pick a theme, hover over ‘Appearance’ and click on ‘Themes’ and ‘Add New’. Choose a theme of your liking.
For the most part, WordPress themes are compatible with the WooCommerce Plugin. If you are unable to find a theme that seamlessly integrates, you can choose from those that are specifically designed to work with the Plugin. Visit WooCommerce’s Theme Store to find ‘The One’, and get your store running!
Extensions
There’s more – to improve a website’s functionality or add features, WooCommerce offers an ‘Extensions’ Library. The extensive library includes 892 extensions of varying purposes, including those in the fields of Payment, Shipping, Conversion, Customer Service, Merchandising, Customizations, Store Management and Marketing.
Make your E-commerce WordPress Website Public
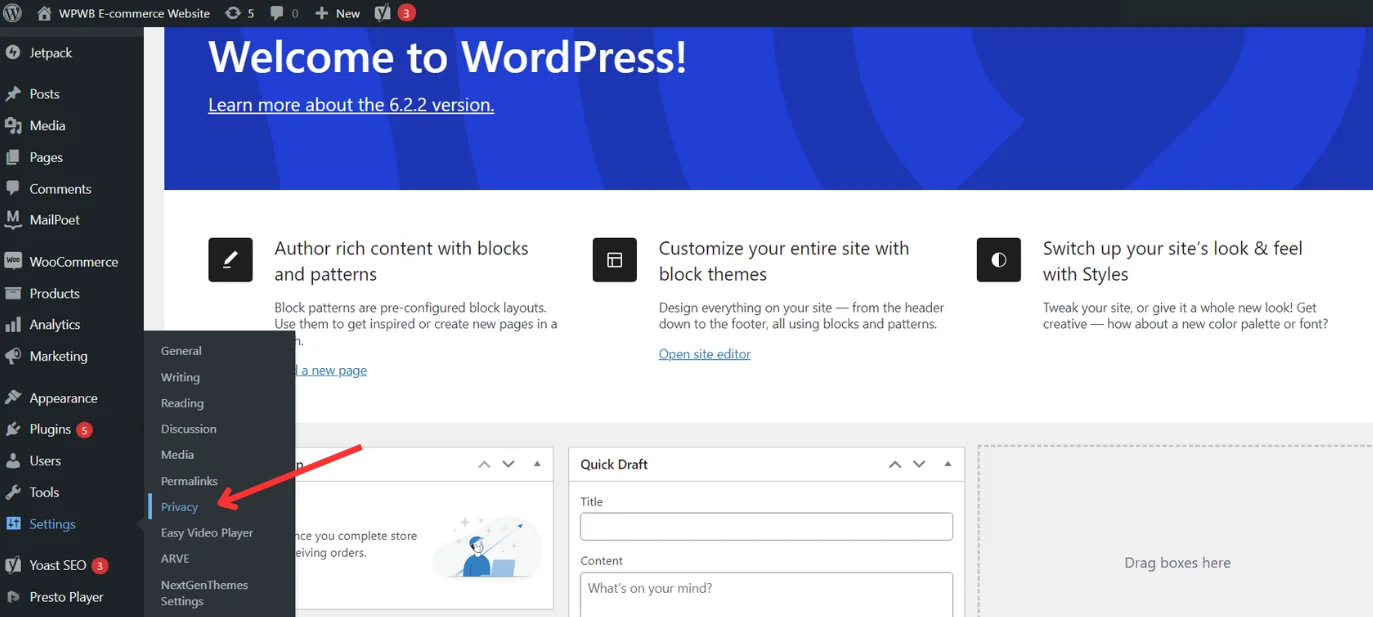
Before publicizing your site, it is important to create a privacy policy.
Hover your cursor over ‘Settings’ on the WordPress dashboard and click on ‘Privacy’.
Create a new Privacy Policy Page or use an existing page.
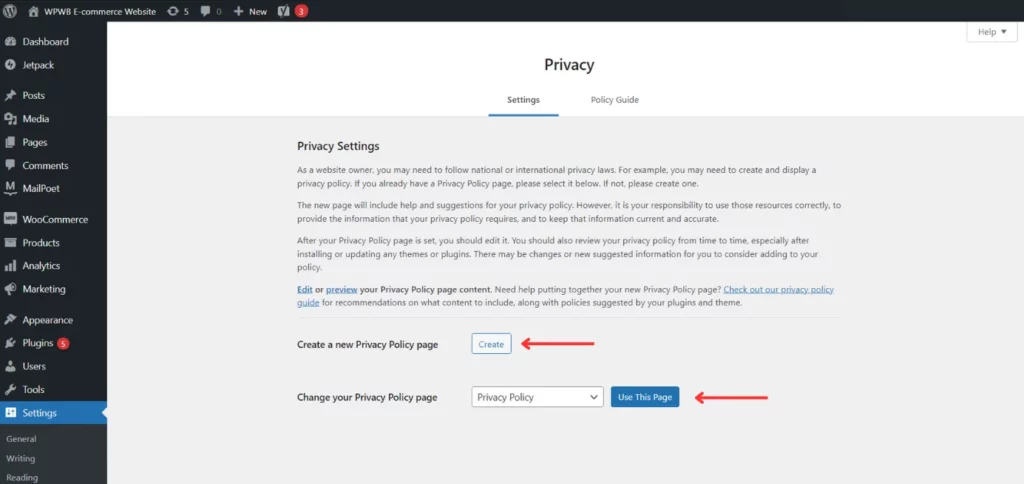
Refer to the ‘Policy Guide’ for guidance and templates to draft your own customized policy.

Once you have uploaded your policy, you will be given an option to make your site public.
It’s time! Unveil your E-commerce website build with WordPress to the public!
Tips to set up an E-commerce Website with WordPress
Want to effectively utilize all available resources and come up with the best possible E-commerce website with WordPress? Here are some pointers for you to achieve just that!
- Select a Webstore-friendly theme that is best suited for your product catalog while being intuitive and easy to navigate! (Pro tip – make use of responsive themes that adapt to different screens)
- Regularly maintain and update your website for a seamless user experience!
- Use sharp and detailed images to give the user a clear picture of what you’re trying to sell!
- You don’t want to mess around with payment details – Secure your payment gateways and protect user information!
- Consider integrating lazy loading or caching to better loading time and speed up browsing!
- Fine-tune product descriptions and titles to raise your website’s rankings on Google!
WordPress E-Commerce in a Nutshell
And there you have it! The 9 steps to successfully launch your E-commerce website with WordPress.
Let’s recap them one last time, shall we :
- The Essentials – Selecting a Domain and Choosing a Hosting
- Set up E-commerce plugins (like – Woocommerce)
- Security Features – Setting up SSL for secure connection
- Add Product and Shipping Details
- Set up Payment
- Add Tax Rates
- Pick a theme that conveys the essence of your brand
- Use extensions to improve a website’s features and functionality
- Create a Privacy Policy before making it Public
In this article, we explored the step-by-step process of creating an E-commerce website with WordPress. The journey may be extensive, but the outcome is undoubtedly rewarding!
With the help of this guide, you can systematically construct a stunningly functional website that showcases your products and gives people a smooth shopping experience.
It’s go time! Set up your business for success and watch it flourish!
FAQs : Your E-commerce WordPress Website Questions, Answered
Absolutely! You can create an eCommerce site with WordPress for free. WordPress itself is an open-source platform, which means you can download and use it without any cost.
Additionally, there are many free eCommerce plugins available, such as WooCommerce, that allow you to set up and manage your online store without any initial investment.
WordPress is a safe and secure platform for an e-commerce website. With proper security measures and best practices, you can create a robust and trustworthy online store on WordPress.
Implementing security plugins, keeping themes and plugins updated, using strong passwords, and enabling SSL encryption are some of the essential steps to fortify your e-commerce site on WordPress. 10 Steps to Secure Your WordPress Site – will help you improve your WordPress security for bigger battles.
Certainly! Yes, you can use WordPress to sell products. With e-commerce plugins like WooCommerce, you can easily set up and manage your online store, offering a range of products or services to your customers directly from your WordPress website.